

Planning a home project—whether it’s a new build, addition, or renovation—starts long before the first hammer swings. One of the most essential and often misunderstood steps in the process is creating permit-ready drawings. These aren’t just rough sketches or inspirational concepts. They are comprehensive, code-compliant documents required by your local jurisdiction before any construction begins.
Understanding how to navigate the process of obtaining permit-ready drawings can save you time, money, and unnecessary delays. Whether you’re in Texas, California, Florida, Illinois, or anywhere else in the U.S., this complete guide will walk you through each step in a way that’s approachable, clear, and tailored to local requirements.
What Are Permit-Ready Drawings?
Permit-ready drawings are detailed architectural and engineering plans that meet your city or county’s building code and zoning regulations. They form the backbone of your construction permit application and typically include:
- Floor plans
- Elevations
- Site plans
- Structural plans
- Electrical layouts
- Mechanical/HVAC plans
- Plumbing diagrams
- Energy compliance forms (like REScheck or Title 24)
These drawings ensure your project is legal, structurally sound, and ready for construction. They also reduce the chances of costly changes during construction or failed inspections.
Why Every U.S. Homeowner Needs Permit-Ready Drawings
Permit-ready drawings aren’t just formalities—they’re essential for:
- Faster permit approvals
- Fewer plan review comments
- Accurate contractor bids
- Smooth communication on-site
- Fewer code violations
- Streamlined inspections
Whether you live in Austin, TX, San Diego, CA, or Charleston, SC, your project won’t move forward without them.
Step 1: Define the Scope of Your Project
Before you dive into plans and permits, clarify the scope of your project:
- Is it a brand-new home, a home addition, or an interior remodel?
- Will it require new foundations, walls, or roof changes?
- Are you converting a garage into an ADU or adding a second story?
- What’s your target square footage and budget?
The clearer your vision, the more accurately your team can deliver. If needed, start with as-built drawings to document what exists today.
Step 2: Research Local Building Department Requirements
Each U.S. city or county enforces unique regulations. A permit-ready drawing for a project in Houston, TX may need different details than one in Portland, OR or Philadelphia, PA.
Visit your local planning department website or consult an expert. Look for:
- Zoning requirements
- Property setbacks
- Maximum building height
- Floor Area Ratio (FAR)
- Lot coverage limits
- Environmental or historic overlays
- Permit checklist
Many jurisdictions—like Los Angeles, New York City, and Miami—provide online portals and checklists. This early research avoids compliance problems later.
Step 3: Hire a Licensed Professional
Once you know what you’re allowed to build, hire a design professional who understands your area’s rules and can turn your vision into permit-ready documents.
Options include:
- Architects – Ideal for complex or large-scale projects
- Residential designers – Great for additions, remodels, and small homes
- Design-build firms – Combine design and construction in one team
- Engineering consultants – Required for structural, HVAC, electrical, and plumbing details
Ensure your team is experienced in your city or county. If you’re based in Florida, California, or Massachusetts, certain projects may require a licensed architect by law.
When comparing professionals, ask:
- Do you offer architectural drafting services?
- Do you coordinate with engineers?
- Can you assist with building permit applications?
- How often are your drawings approved on the first try?
Step 4: Conduct a Site Survey or As-Built Review
Before new designs can begin, your designer may need to:
- Measure the existing structure
- Document current electrical and plumbing layouts
- Record window, door, and ceiling heights
- Confirm site dimensions with a licensed surveyor (if required)
If you’re remodeling, start with as-built drawings. These provide an accurate base for new construction plans.
Step 5: Conceptual Design and Schematic Planning
Now comes the creative part—early design concepts.
You’ll work with your architect or designer to explore:
- Floor plan options
- Room sizes and layouts
- Functional flow and circulation
- Elevations and exterior design
- Material palettes
- Initial budget projections
Your designer may use hand sketches or 3D modeling tools like those in our 3D architectural modeling services to help you visualize the project.
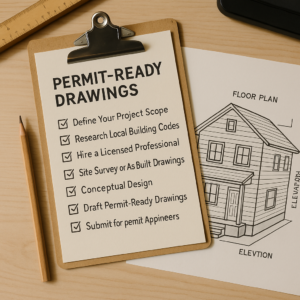 Step 6: Drafting the Permit-Ready Construction Set
Once the concept is approved, your designer will begin producing the full construction drawing set. These drawings will align with your city’s permit checklist and include:
Typical Sheets in a Permit Set:
- Title page with codes and zoning data
- Site plan with setbacks and utilities
- Floor plans with room labels and dimensions
- Elevations (front, rear, side views)
- Building sections (vertical cut-throughs)
- Roof plans and framing layouts
- Structural framing and foundation plans
- Electrical layout (lighting, switches, outlets)
- Plumbing and HVAC system layouts
- Energy compliance forms like REScheck or Title 24
Need help? Our building permit services include a full drawing set review before submission.
Step 7: Coordinate with Engineers
Depending on your project’s complexity and state rules, your designer may need to bring in licensed engineers to complete:
- Structural calculations (beams, shear walls, footings)
- Mechanical system layouts (HVAC)
- Electrical load schedules and panel details
- Plumbing diagrams and risers
- Civil site grading and drainage plans (if required)
In most U.S. cities, projects involving new foundations, multi-story additions, or seismic zones (like California) will require stamped engineering plans.
Step 8: Internal Quality Review
Before submitting your permit application, your architect will:
- Double-check the set against the jurisdiction’s permit checklist
- Add required code citations
- Confirm structural notes and engineer seals
- Check for missing dimensions or labeling errors
- Complete energy forms and calculations
This internal review prevents common reasons for rejection.
Step 9: Submit for Permit Approval
Most cities now allow online submission via planning portals such as:
- ePlans (Chicago)
- LADBS (Los Angeles)
- ProjectDox (Miami, Houston)
- Austin Build + Connect
You’ll typically upload:
- The full PDF drawing set
- Application forms
- Energy documents
- Engineering calculations
- Permit fee payment
If you’d like assistance, our team also provides commercial permit services for mixed-use or multifamily projects.
Step 10: Address Plan Review Comments
Expect your city to issue comments or request revisions. This is normal.
Common issues include:
- Missing detail sections
- Incorrect structural specifications
- Code section inconsistencies
- Site plan conflicts with zoning
- Incomplete energy documentation
Your architect will respond with corrected sheets. Once all comments are resolved, your permit will be issued.
Step 11: Get Permit Approval and Start Construction
After final approval, you’ll receive:
- A stamped, approved drawing set
- An official permit card or number
- Job site display requirements
Now you’re ready to build. Contractors must follow the approved plans exactly. Inspectors will use the permit set to verify code compliance throughout construction.
Call to Action: Ready to Get Permit-Ready Drawings?
If you’re planning a renovation, addition, or new home anywhere in the U.S., don’t get stuck in red tape. Unified Studio Architect offers:
Localized drafting and design
Code-compliant permit drawing sets
Structural and MEP coordination
Full permit application support
Let our team turn your vision into buildable plans.
👉 Book a Free Consultation and let’s get your project started today.
Frequently Asked Questions (FAQ)
Q1: Do I need an architect for permit-ready drawings?
A: In many states, yes—especially for larger or structural projects. In others, a qualified residential designer may suffice. Always check local regulations.
Q2: How long does it take to create permit-ready drawings?
A: Simple remodels may take 2–4 weeks. Complex additions or new homes can take 6–12 weeks, including engineering and revisions.
Q3: What happens if my drawings don’t get approved?
A: Your local department will issue correction comments. Your designer will revise the drawings and resubmit. This process may repeat once or twice.
Q4: Can I use the same drawings in different cities or states?
A: No. Building codes and zoning rules vary by city and county. Each permit-ready set must be customized for the project’s location.
Q5: What’s included in your permit drawing services?
A: We offer a complete package—as-built drawings, conceptual design, drafting, engineer coordination, and building permit submission.